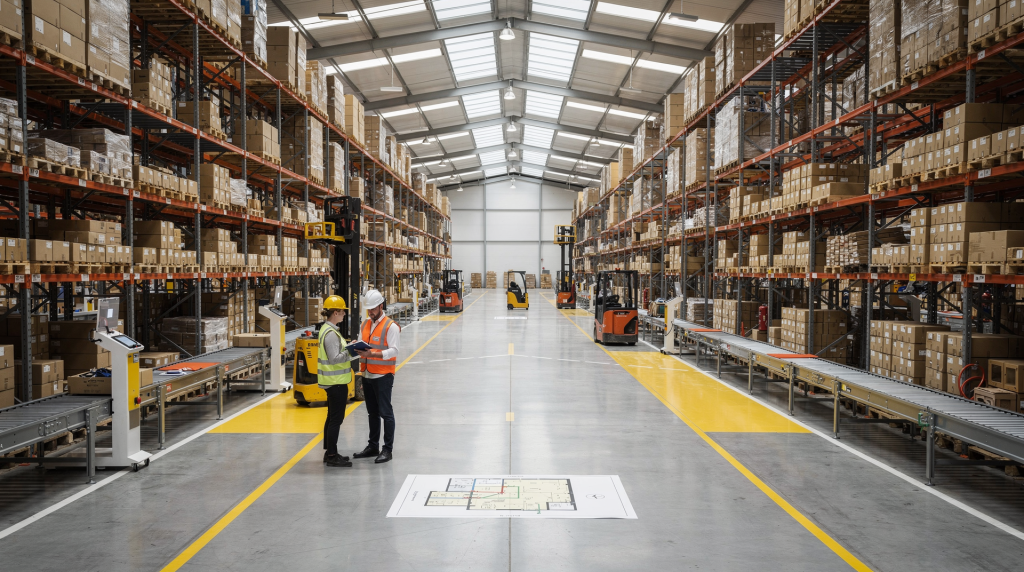
A warehouse layout can make the difference between fast, accurate shipping and a daily bottleneck that drains labor. The best layouts reduce walking, shorten pick paths, and keep receiving, packing, shipping, and returns moving in one clean flow.
Why warehouse layout matters for fulfillment speed
Most fulfillment delays come from avoidable friction: too much walking, bad slotting, crowded aisles, and stations placed in the wrong order. When I ran my own e-commerce operation, I learned this the hard way. We expanded from a spare room to a 2,000-square-foot unit, and suddenly the layout we inherited from the previous tenant became our biggest operational cost. Pickers were walking half a mile per shift just to grab fast-moving SKUs stored in the back corner.
A good layout solves three problems at once: it moves goods efficiently from receiving to shipping, helps pickers find items quickly, and keeps the operation safe and scalable. The main goal is simple: minimize touches and travel distance without creating congestion. Every extra step a picker takes compounds across dozens of orders and multiple shifts. What looks like a minor inefficiency on a floor plan becomes a serious labor cost in practice.
For e-commerce and 3PL operations, layout is not just a space-planning exercise. It directly affects:
- Pick speed
- Order accuracy
- Labor cost
- Dock congestion
- Shipping cut-off performance
- Ability to handle seasonal spikes
If the warehouse is growing, the layout should support higher throughput without forcing a full relocation every time volume increases. I’ve seen brands sign a five-year lease on a space that worked perfectly for their current volume, only to outgrow the layout within eighteen months because the flow couldn’t scale. That’s an expensive mistake that smart planning prevents.
Start with the order profile, not the floor plan
Before moving racks or drawing aisles, define how the operation actually works. The right layout depends on SKU behavior, order patterns, and volume. Too many operators walk into an empty warehouse and immediately start sketching zones based on the square footage. That’s backwards. The data should dictate the layout, not the other way around.
Data to review first
- Orders per day and peak-day volume
- Lines per order
- Units per line
- SKU count
- Cube per SKU
- Velocity tiers, such as A/B/C
- Inbound and outbound dock volume
- Percentage of returns, cross-dock, and rework
A useful rule is to pull at least 6–12 months of data. That reveals what is truly fast-moving versus what only looks busy during promotions or seasonal spikes. I once worked with a brand that designed their entire forward-pick zone around a SKU that sold well during a two-week holiday promotion. For the other fifty weeks of the year, that prime real estate sat underutilized while actual fast movers were buried in the back. Seasonal data without context is misleading.
Questions to answer
- Which SKUs are picked most often?
- Which items are often ordered together?
- Where do bottlenecks happen now?
- How many orders must ship before each cut-off time?
- Do you mostly ship single-line parcel orders or multi-line orders?
The answers determine whether the warehouse should prioritize dense forward picking, wide staging areas, automation, or a simple manual flow. A brand shipping mostly single-line orders needs a different layout than one fulfilling complex multi-line orders with kitting requirements. The order profile shapes everything downstream.
The main warehouse zones that need to work together
A fast fulfillment layout usually has distinct zones with minimal cross-traffic. When these zones bleed into each other, the operation slows down in ways that are hard to diagnose because everything looks busy. The key is separation with clear handoff points.
| Zone | Purpose | Layout priority |
|---|---|---|
| Receiving | Unload, check, and sort inbound goods | Close to inbound dock, easy inspection access |
| Putaway | Move product into storage | Short travel to storage locations |
| Storage | Hold reserve stock and slow movers | Density, accessibility, and safety |
| Forward pick | Store fast movers near packing | Shortest possible picker travel |
| Packing | Verify, pack, label, and prepare orders | Close to pick areas and shipping |
| Shipping | Stage parcels and pallets for carrier pickup | Adjacent to outbound dock |
| Returns | Inspect and process returns | Separate from clean outbound flow |
| Exception area | Hold damaged, short, or non-conforming goods | Isolated and easy to control |
The most common mistake is placing these functions in a way that forces people and carts to cross paths repeatedly. A warehouse should feel like a one-way system, not a traffic circle. I’ve walked through facilities where the packing station sat between receiving and storage, and every inbound pallet had to navigate around packers to reach the racks. That’s the kind of friction that adds minutes to every putaway and creates safety hazards.
Choose the right flow pattern
Most fulfillment warehouses use one of three basic layout shapes. The choice depends on the building footprint, dock configuration, and order profile. There’s no perfect answer, but there are clear trade-offs.
U-shaped layout
Receiving and shipping sit on the same side of the building, with storage in the middle.
Best for:
- E-commerce operations
- 3PLs with mixed order profiles
- Buildings with limited dock sides
- Cross-docking workflows
Advantages:
- Short internal travel
- Easy to connect receiving, pick, pack, and ship
- Efficient for shared labor
- Works well in many urban and suburban buildings
I-shaped layout
Receiving is on one end, shipping on the other.
Best for:
- High-volume, highly standardized flows
- Operations with clear separation between inbound and outbound
- Long, rectangular facilities
Advantages:
- Simple traffic pattern
- Less backtracking
- Good when flow is very predictable
L-shaped layout
Inbound and outbound sit on adjacent sides of an irregular building.
Best for:
- Unusual building footprints
- Sites with access constraints
- Facilities that need to work around columns, offices, or structural limits
Advantages:
- Flexible in awkward buildings
- Can still support clean flow if zones are planned carefully
Which one is best?
There is no universal winner. For many e-commerce operations, a U-shaped or L-shaped flow is the most practical because it supports a clean receiving-to-ship path and reduces travel time. I’ve personally worked in both U-shaped and I-shaped facilities, and the U-shape consistently performed better for mixed-order e-commerce because it allowed supervisors to oversee multiple zones from a central point. The I-shape worked well when we ran a single high-volume product line with predictable daily throughput, but it fell apart during seasonal spikes when the flow became less uniform.
Slotting strategy: put the right items in the right places
A fast warehouse is not only about layout shape. It is also about where inventory lives inside that shape. Slotting is where the theoretical layout meets operational reality. You can have a perfectly designed flow pattern, but if the wrong SKUs sit in the wrong locations, pickers will still waste time walking.
Core slotting rules
- Put fastest-moving SKUs closest to packing
- Place frequently paired items near each other
- Keep high-frequency stock in the “golden zone” between knee and shoulder height
- Store bulky or slow movers farther away
- Isolate heavy, hazardous, or awkward items
- Use right-size bins so pickers are not reaching into oversized locations
This is where many warehouses waste time. If a picker walks 200 extra feet ten times a day, that looks small on paper but becomes expensive across weeks and headcount. During my e-commerce days, we recalculated that a single poorly slotted SKU was costing us roughly $1,200 per year in extra labor. Multiply that across fifty SKUs, and the savings from proper slotting become impossible to ignore.
ABC slotting in plain English
- A items: fast movers, closest and easiest to reach
- B items: medium movers, in secondary locations
- C items: slow movers, deeper in storage
You can go further by grouping items that are frequently ordered together. For example, phone cases and chargers should not be on opposite sides of the facility if they often appear in the same order. Affinity slotting like this reduces picker travel more than ABC classification alone. I’ve seen operations cut pick times by 15–20% just by analyzing order affinity and adjusting slotting accordingly.
Pick path design: reduce walking and decision points
A good layout supports a simple, repeatable pick path. The goal is to reduce unnecessary turns, U-turns, and aisle crossings. Every decision a picker has to make slows them down and increases the chance of errors.
Useful picking principles
- Keep main aisles clear and wide enough for safe movement
- Use one-way travel where possible
- Group locations in logical sequence
- Avoid dead-end aisles that force backtracking
- Place staging near packing
- Make location labels easy to read from the aisle
One-way aisles and serpentine routes often work well because they reduce collisions and lower decision fatigue. The fewer times a picker has to stop and think, the faster and more accurate the operation becomes. In practice, this means designing aisles so a picker can walk a continuous path without doubling back. It sounds simple, but I’ve audited warehouses where the pick path required crossing the main traffic artery three times per order, creating congestion and safety risks.
Common picking methods supported by layout
- Single-order picking
- Batch picking
- Zone picking
- Wave picking
The layout should match the method. For example, batch picking benefits from clustered fast movers and clean aisle logic, while zone picking needs very clear handoff points between areas. If you’re running zone picking but your layout doesn’t have designated handoff staging at zone boundaries, orders will pile up and the system breaks down.
Packing and shipping must be close to each other
Packing is not a place to “find space later.” It is one of the most important fulfillment zones and should sit directly in the path between picking and shipping. I’ve seen too many operations treat packing as an afterthought, squeezing benches into whatever corner was available. That creates immediate bottlenecks during peak hours.
Good packing area design
- Enough bench space for peak order volume
- Easy access to cartons, mailers, tape, void fill, and labels
- Clear separation between completed orders and work-in-progress
- Space for quality checks and exception handling
- Direct access to outbound staging
Shipping staging needs discipline
Staging should be organized by:
- Carrier
- Route
- Cut-off time
- Service level
Without this, the outbound area becomes a pile of mixed parcels that slows truck handoff and increases mis-shipments. I once watched a warehouse miss a carrier cut-off because the staging area was so disorganized that the team couldn’t find the priority parcels in time. That single miss cost more in expedited shipping than a proper staging system would have cost to implement.
Receiving and returns need their own logic
Receiving should be close to the inbound dock and separated from shipping activity as much as possible. That keeps inbound pallets and cartons from clogging the outbound process. When these two functions share space, the result is predictable: inbound shipments block outbound staging, and the team spends valuable time shuffling pallets instead of processing orders.
Returns deserve a dedicated area too. Returned goods often need:
- Inspection
- Rebagging
- Re-labeling
- Recounting
- Disposition decisions
If returns are mixed into normal receiving, the team loses time and the warehouse becomes harder to control. Returns processing requires a different mindset and workflow than inbound receiving, and the physical space should reflect that. A separate returns area with its own staging and inspection stations prevents cross-contamination between clean inventory and items that need rework.
A practical planning checklist
Use this checklist when reviewing or redesigning a warehouse. I’ve used variations of this list across multiple facility moves, and it catches the issues that tend to surface only after you’ve signed the lease and started operations.
Layout planning checklist
- Map the current flow from receiving to shipping
- Measure actual travel distances for common pick routes
- Identify the top 20% of SKUs that drive most order volume
- Separate receiving, storage, picking, packing, shipping, and returns
- Create a dedicated exception area
- Place fast movers near packing
- Set clear aisle directions and labels
- Remove cross-traffic between people, carts, and equipment
- Build staging space for peak days, not average days
- Confirm the layout can scale with seasonal growth
Typical mistakes that slow fulfillment
1. Designing around storage density only
A layout can look efficient on paper and still be slow in practice. If pickers travel too far, density becomes a false win. I’ve seen warehouses packed floor-to-ceiling with inventory that looked impressive but operated at half the speed of a less dense facility with smarter slotting.
2. Mixing inbound and outbound flows
When receiving and shipping collide, everything slows down. Docks get crowded, mistakes rise, and labor gets wasted. This is especially dangerous during peak seasons when both inbound and outbound volumes spike simultaneously.
3. Ignoring SKU velocity
Treating all products the same is one of the fastest ways to create long pick paths. Velocity data exists for a reason, and ignoring it means your fastest movers will inevitably end up in the least accessible locations.
4. Underbuilding staging space
Many warehouses underestimate how much room is needed between packing and shipping. Staging bottlenecks create backlogs even when picking is fine. The staging area should be sized for peak volume, not average daily throughput.
5. Forgetting returns and exceptions
A small exception area saves a large amount of confusion later. Without it, damaged goods and problem orders end up scattered across the facility, creating hidden inventory discrepancies.
6. Changing layout without changing process
Moving racks alone will not fix a bad workflow. Layout, slotting, and picking method must work together. I’ve consulted with operations that spent thousands on re-racking only to discover that their picking process was the real bottleneck.
How to evaluate whether your layout is working
A warehouse layout should be measured against operating results, not just visual cleanliness. A tidy warehouse can still be slow, and a slightly messy one can be fast if the flow is right. The metrics tell the real story.
Track these KPIs
- Pick rate per hour
- Order accuracy
- Travel time per order
- Dock-to-stock time
- Cycle count accuracy
- On-time shipment rate
- Lines picked per labor hour
- Rework and exception rate
If speed improves but accuracy falls, the layout is not truly better. If accuracy is strong but travel time is excessive, the layout still needs work. The best layouts balance both, and the KPIs should be tracked over time to catch degradation before it becomes a crisis.
Step-by-step: how to redesign a warehouse layout
1. Gather data
Review volume, SKU velocity, order structure, and peak periods. Don’t skip this step. Data from the last twelve months reveals patterns that gut feelings miss.
2. Sketch the current flow
Map how product actually moves today, not how it is supposed to move. Walk the floor during a busy shift and trace the paths pickers take. You’ll often find they’ve created informal shortcuts that reveal flaws in the official layout.
3. Identify bottlenecks
Look for long walks, cross-traffic, dock congestion, and packing backlogs. Bottlenecks tend to cluster around shared resources like printers, scales, and dock doors.
4. Set layout priorities
Decide whether the operation needs more speed, more density, more flexibility, or more safety. The answer depends on your growth stage and order profile.
5. Re-slot inventory
Move A items closer to packing and create better family groupings. This single step often delivers the fastest ROI in a layout redesign.
6. Define aisle rules
Set direction, labeling, and traffic controls. One-way aisles with clear floor markings reduce collisions and decision fatigue.
7. Rebuild staging logic
Separate inbound, outbound, and exception areas. Each needs its own space with clear boundaries.
8. Test before scaling
Run a pilot or one-zone rollout before changing the whole facility. A small-scale test reveals problems that look fine on a floor plan but break down in practice.
When to bring in a professional
A layout redesign becomes more complex when the warehouse has:
- High order volume
- Multiple pick methods
- Seasonal peaks
- Mixed pallet and parcel operations
- Fire protection or racking constraints
- A growing returns workflow
- Automation or conveyor plans
At that point, the layout is no longer just about space. It becomes a labor, equipment, and building-geometry problem. The interplay between racking, fire suppression systems, material handling equipment, and workflow becomes too complex for intuition alone. I’ve seen operations waste months trying to self-design a layout that a professional could have optimized in weeks, and the delay cost more than the consulting fee.
FAQ
What is the main goal of warehouse layout planning?
The main goal is to reduce travel, touches, and congestion while keeping receiving, picking, packing, and shipping in a clean flow. Every extra touch or unnecessary step adds labor cost and increases the chance of errors.
What layout is best for e-commerce fulfillment?
A U-shaped or L-shaped layout is often the most practical for e-commerce because it supports efficient movement from inbound to outbound with less backtracking. These shapes also work well in the types of buildings most available to growing brands in urban and suburban markets.
How do you make order picking faster?
Place fast movers near packing, shorten pick paths, use one-way aisles where possible, and group frequently ordered items together. The combination of smart slotting and clean aisle design typically delivers more speed improvement than any single change.
Should receiving and shipping be separate?
Yes. Separate flow is usually better because it reduces congestion, confusion, and handling delays. When these functions share space, inbound and outbound activities compete for the same dock doors, staging areas, and labor attention.
How much staging space does a warehouse need?
It depends on volume and cut-off times, but staging should be planned for peak periods, not average days. A staging area sized for average volume will overflow during seasonal spikes, creating backlogs that ripple backward through packing and picking.
Conclusion
Warehouse layout planning is one of the fastest ways to improve fulfillment speed without immediately adding more labor. The strongest layouts match real order data, separate major workflow zones, shorten picker travel, and keep packing and shipping tightly connected.
If the warehouse feels busy but slow, the problem is often not effort. It is flow. A better layout turns that effort into faster, cleaner order fulfillment. And for brands that started online and are now managing their own physical space, getting the layout right early prevents the kind of expensive, disruptive rework that kills margins and frustrates teams.